

 Tweet
Tweet
LOADS of photos here peeps, so split it into three separate Blogs
This is the finished product... but how did I get here?

SO.... the plan was to make the dash area 'OEM+' so it kind of looked like VW could have designed it but setup exactly how I wanted it.
My list of 'wants' is pretty huge but I managed to cover most of them off.
- MFA Clocks
- Passenger Airbag
- Enough switches for all my 'accessories'
- Boost Gauge
- Cup holders!
- Double DIN head unit, mounted well & easy to control
- USB charger socket + Head Unit Connector
- Nice looking dash (NOT AWFUL FLOCK!)
This was the original plan.... what a bloody mess!!!


I like to think I made it look much nicer..... took about 18 months to do though!
MFA Clocks
I wanted to see my MPG, Distance Till Empty and all the other bits an MFA setup gives you.
After looking at a few add on systems, I decided to buy a set of Passat B5.5 clocks.
Actually, I ended up buying a selection from eBay Only £20-£30 each and managed to sell them after I found the right one.

Sent off my stock clocks and the Passat ones to a top bloke at SyncroSport who took my old T4 set, copied everything from them and pushed the data to the new Passat clocks.
So the K meter will be the same (MPH will be right)
The fuel gauge will work the same,
Same miles on the clocks,
Service intervals show the same... (With link to the oil sensor)
Airbags setup the same
He has also added some new "extras"... like....
In the standard setup, if the engine temp is between 70 and 100 degrees, the display shows 90, spot on the middle.
This has been changed so it actually reflects the REAL temp the engine is running at.
Having it more accurate can only be good.
Immobiliser has been coded, so we can use it and remove the daft external T4 immobiliser setup.
He has created two transponders to use with the new clocks, in my keys.
The MFA will also show distance till empty, as well as all the other bits.
ABS light has been turned off.
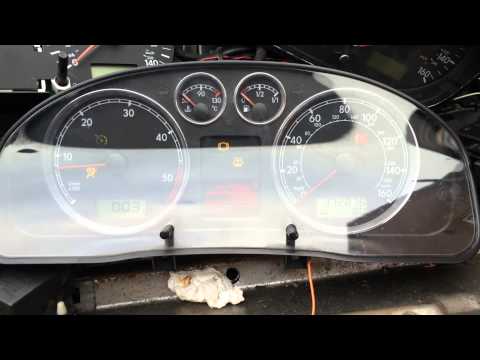
Another cool little mod which was suggested and I have gone for is the "normal" running light.
So when the ignition is on, the needles and LCD's are on.
When the side or full lights are on, everything comes on as normal.
REALLY like the look of this. (See below)

Quick test before fitting the immobiliser and swapping out the facia.
Had to use the front transparent fascia from the T4 and replace the stock Passat one, so it fitted properly.
Also had a few issues with the T4 indicator and full beam inserts not quite fitting but after a bit of sanding down and a spot of super glue, it was sorted.


Very happy with the results.
Just had to add the MFA indicator stalk for it all to work.

----------------------
Passenger Airbag
I love my wife (who is the most regular passenger) so I want her to be safe. Which, to me means that I really needed to retro fit an airbag to the passenger side.
Managed to find a passenger airbag and cover on eBay that wasn't too crazy cash wise so I bought it and looked into retro fitting the kit to my current dash.
Two major issues.
1) The non airbag dash is NOT setup for an airbag, there is extra strength in the airbag version, along with holding points for the airbag cover and the hole required.
2) My dash is BADLY flocked (by a previous owner) and I quickly grew to hate it, so I decided buying a new airbag dash would be the way to go. Specially as one of my list is to have the dash look better and a flock was off the cards due to personal preference.
Luckily for me, Paul Lever (who was just starting T4Parts) had just bought a multi-van that had been involved in a collision.
This blue bus had the airbag dash but the airbags had been deployed. Not an issue for me as I had everything else.
Quick drive to see him and 30mins playing in the rain with sockets and spanners and we had the dash out. (Thanks AGAIN for helping me with that chap!)
Had to test fit all the bits in mine, so the dash had to come out. I drove around like this for nearly 8 months!
With all the bits cable tied down and some megavan carpet put over everything so it looked "OK" from a distance, just in case


All worked and looked like it was going to line up, so I moved onto making the dash look good. But first I had to sort out all the other bits I was going to put into the dash.
----------------------
Enough switches for all my 'accessories'
This was going to be tricky as I wanted around TEN switches, they all needed to be easy to access and look 'stock'.
Initially went down the ridiculous 'missile launch' switches but luckily Tamsin (my wife) managed to convince me how stupid they would look and NOT OEM at all.
Finally decided on Carling Switches "V-Switch" after finding out they are the 'best' aftermarket switches you can buy.
But how to tell which is which?
Well, the guys at MudStuff sorted me out. They organised a laser etching of the switches, so I had EXACTLY what I wanted on them!
Truly custom.
Next step was working out where to put all these switches. Luckily Carling do a '5 block' holder that fit perfectly in the middle fascia.

Trying to decide how I wanted it laid out.


Went with the 'off set' version, so it would be easier for me to work out which was which in the dark.
Next cam the mammoth task of wiring everything up.
This was made much easier as the kit form Carling came with connectors and spades for me to use.
Was a HUGE learning curve but I got there, after turning the spare bedroom into a spaghetti den!


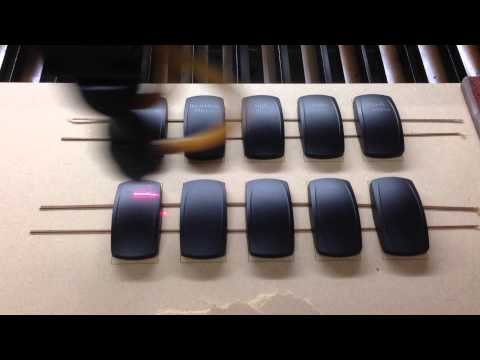
Also, as the switches have lights in (green for ambient and orange for “on”) I decided I wanted to be able to turn these on and off.
Just in case it was too bright (although the brightness can be controlled from the main dimmer for the clusters) and I wanted them off, I linked one of the switches itself up to turn them on and off.
So all the switches would work… but one of them would turn the lights on the switches on or off….
Like this:

Spent quite a bit of time with body filer and sandpaper, getting the 5 blocks to blend into the middle fascia well.
Ready for painting. But I also wanted to sort out my boost gauge.
Oh, the Hazard switch was a bit of a git...
But Mario from MV Engineering stepped up and sorted out all the electrical stuff I couldn't get my head round and now it works as it should.


----------------------
Boost Gauge
Starting to run more boost and the idea of doing so without a boost gauge is scary too me.
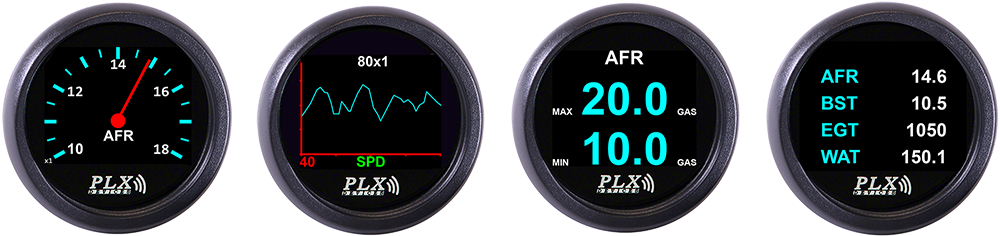
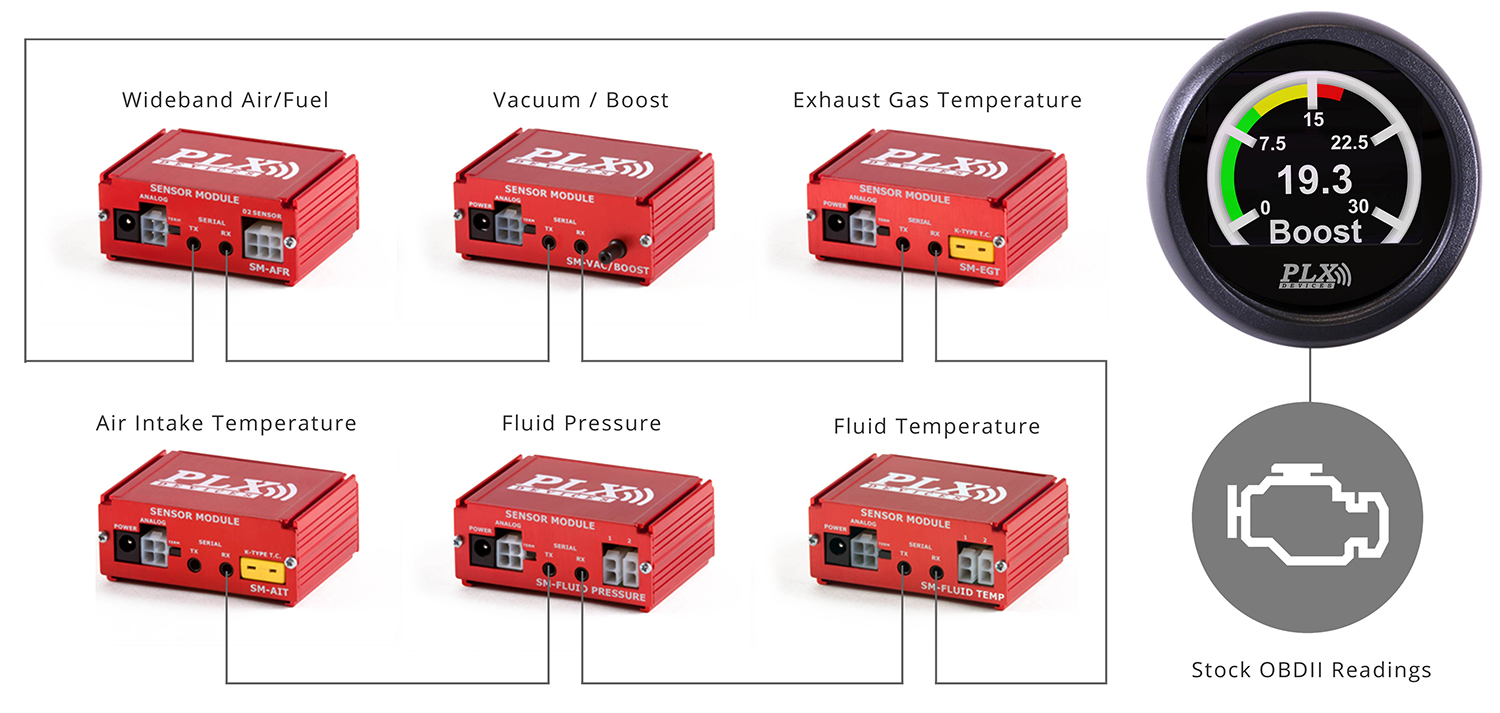
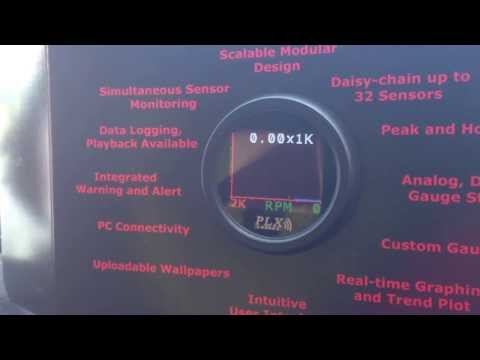
So I began looking into gages. With nothing else analogue in the van, I wanted something digital, then I found the PLX MultiGauge.

This fully expandable kit is superb. A single screen lets you show 4 values at a time, which you can either take from the ECU or you can daisy chain lots of other bolt on sensors which you can also display.
This was properly plug and play out of the box. Had to have a quick try with it as soon as it arrived.
RIGHT... where to put it? Well, you might have spotted I opted to add a Carling Hazard switch, so the stock triangle hazard button was spare.


Another little gadget that I am still very happy with.
Currently shows MPH, Boost, RPM and Air Intake Temps
-----
Carry on reading my work in Custom Dash Madness Part II here